As Head of Mobile R&D in Seeking Alpha I’m being asked constantly by developers and product managers alike if we can implement a feature on both the phone and the tablet.
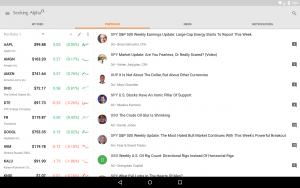
For example, here is the Seeking Alpha Android application showing the portfolio page on a phone and on a tablet:
Android developers would add their flavor to the question – is it possible to use the same RecyclerViews code on both the phone and the tablet? For example – in the portfolio page screens shown above, the phone list is composed of 2 main type of items – the symbols (with their prices) and the articles (on the bottom of the screen). The tablet screen contain the same items, but laid out differently – the symbols are on the left side of the screen while the articles are on the right side. In this tutorial I will show you how simple it is to achieve such functionality with RecyclerView that utilize the same code for phone and tablets.
The Phone Application
Let’s start by creating an Android Studio project (with a blank Activity). For the Activity layout we’ll create a simple RecyclerView layout:
<?xml version="1.0" encoding="utf-8"?>
<android.support.v7.widget.RecyclerView xmlns:android="http://schemas.android.com/apk/res/android"
    xmlns:tools="http://schemas.android.com/tools"
    android:layout_width="match_parent"
    android:layout_height="wrap_content"
    android:id="@+id/phone_recycler_view"
</android.support.v7.widget.RecyclerView>
And also a row layout for the items we’ll show in the RecyclerView:
<?xml version="1.0" encoding="utf-8"?>
<TextView xmlns:android="http://schemas.android.com/apk/res/android"
    xmlns:tools="http://schemas.android.com/tools"
    android:layout_width="match_parent"
    android:layout_height="wrap_content"
    android:paddingLeft="@dimen/horizontal_margin"
    android:paddingRight="@dimen/horizontal_margin"
    android:paddingTop="@dimen/vertical_margin"
    android:paddingBottom="@dimen/vertical_margin"
    android:id="@+id/text"
    android:textSize="16sp"
    tools:text="This is a sample text line">
</TextView>
We’ll create a simple ViewHolder for the RecyclerViews:
public class SimpleViewHolder extends RecyclerView.ViewHolder {

    public TextView title;

    public SimpleViewHolder(View itemView) {
        super(itemView);
        title = (TextView) itemView.findViewById(R.id.text);
    }
}
And a RecyclerView adapter to hold these simple items. The adapter will hold items of the first type (the symbols and their prices, for example):
public class TypeARecyclerViewAdapter extends RecyclerView.Adapter<SimpleViewHolder> {

    @Override
    public int getItemCount() {
        return 5;
    }

    @Override
    public SimpleViewHolder onCreateViewHolder(ViewGroup parent, int viewType) {
        View itemView = LayoutInflater.from(parent.getContext()).inflate(R.layout.row, null);
        return new SimpleViewHolder(itemView);
    }

    @Override
    public void onBindViewHolder(SimpleViewHolder holder, int position) {
        holder.title.setText("Recycler Type A - " + ++position);
    }

}
As you can see this adapter holds 5 (hard coded, I know) items of type “A”. Now we can write the code to use the RecyclerView and this Adapter in our main activity:
public class MainActivity extends AppCompatActivity {

    RecyclerView phoneRecyclerView;

    @Override
    protected void onCreate(Bundle savedInstanceState) {
        super.onCreate(savedInstanceState);
        setContentView(R.layout.activity_main);
        phoneRecyclerView = (RecyclerView) findViewById(R.id.phone_recycler_view);
        phoneRecyclerView.setLayoutManager(new LinearLayoutManager(this, LinearLayoutManager.VERTICAL, false));
        phoneRecyclerView.setAdapter(new TypeARecyclerViewAdapter());
    }

}
This is what we get when we run this: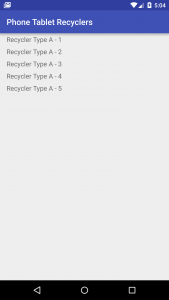
Now let’s create a second adapter which will hold items of another type (the articles, for example):
public class TypeBRecyclerViewAdapter extends TypeARecyclerViewAdapter {

    @Override
    public int getItemCount() {
        return 30;
    }

    @Override
    public void onBindViewHolder(SimpleViewHolder holder, int position) {
        holder.title.setText("Recycler Type B - " + ++position);
    }

}
Since we are using the same simple item, we can extend the first adapter and override only the number of items (30 hard coded in this case) and the binding (to show that the item is of type “B”). We can use this adapter in the activity:
public class MainActivity extends AppCompatActivity {

    RecyclerView phoneRecyclerView;

    @Override
    protected void onCreate(Bundle savedInstanceState) {
        super.onCreate(savedInstanceState);
        setContentView(R.layout.activity_main);
        phoneRecyclerView = (RecyclerView) findViewById(R.id.phone_recycler_view);
        phoneRecyclerView.setLayoutManager(new LinearLayoutManager(this, LinearLayoutManager.VERTICAL, false));
        phoneRecyclerView.setAdapter(new TypeBRecyclerViewAdapter());
    }

}
The only change is in line 11 (highlighted) – we changed the adapter from TypeARecyclerViewAdpater to TypeBRecyclerViewAdapter, and we get:
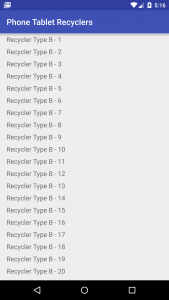 Now we can combine both adapters into a “parent” adapter that will be used on phones:
public class PhoneRecyclerViewAdapter extends RecyclerView.Adapter<SimpleViewHolder> {

    TypeARecyclerViewAdapter adapterA;
    TypeBRecyclerViewAdapter adapterB;

    public PhoneRecyclerViewAdapter() {
        super();
        adapterA = new TypeARecyclerViewAdapter();
        adapterB = new TypeBRecyclerViewAdapter();
    }

    @Override
    public int getItemCount() {
        return adapterA.getItemCount() + adapterB.getItemCount();
    }

    @Override
    public SimpleViewHolder onCreateViewHolder(ViewGroup parent, int viewType) {
        return adapterA.onCreateViewHolder(parent, viewType);
    }

    @Override
    public void onBindViewHolder(SimpleViewHolder holder, int position) {
        if(position < adapterA.getItemCount()) {
            adapterA.onBindViewHolder(holder, position);
            return;
        }
        adapterB.onBindViewHolder(holder, position - adapterA.getItemCount());
    }

}
As you can see the adapter holds internally the 2 adapters we used above, and combines them to get the actual items count, and handle the proper binding. We’ll use this new adapter in the Activity:
    @Override
    protected void onCreate(Bundle savedInstanceState) {
        ...
        phoneRecyclerView.setAdapter(new PhoneRecyclerViewAdapter());
    }
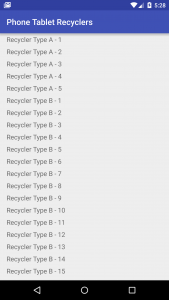
And when we run it we get:
Great. Now we can move on to the tablet. If we try to run this code on the tablet (for example with the adapter of type “A”), we get:
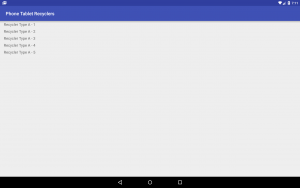 So we need to make some changes.
The Tablet Application
For the tablet, we’ll simply use the two TypeX… adapters in two different RecyclerViews. Let’s start with the activity layout. Remember to put it in the layout-sw720dp resources folder (or an equivalent resource folder qualifier that suits you):
<?xml version="1.0" encoding="utf-8"?>
<LinearLayout xmlns:android="http://schemas.android.com/apk/res/android"
    xmlns:tools="http://schemas.android.com/tools"
    android:layout_width="match_parent"
    android:layout_height="match_parent"
    android:orientation="horizontal">

    <android.support.v7.widget.RecyclerView
        android:layout_width="match_parent"
        android:layout_height="wrap_content"
        android:id="@+id/phone_recycler_view"
        android:layout_weight="6"
    </android.support.v7.widget.RecyclerView>

    <android.support.v7.widget.RecyclerView
        android:layout_width="match_parent"
        android:layout_height="wrap_content"
        android:id="@+id/right_recycler_view"
        android:layout_weight="4"
    </android.support.v7.widget.RecyclerView>

</LinearLayout>
As you can see the layout contains 2 RecyclerViews. We kept the left one with the same id to make things simpler. In real life application we will usually use fragments and allocate different fragments to phone and tablet, so the code will vary slightly. In our case we’ll modify slightly the Activity code:
public class MainActivity extends AppCompatActivity {

    RecyclerView phoneRecyclerView;
    RecyclerView tabletRightRecyclerView;

    @Override
    protected void onCreate(Bundle savedInstanceState) {
        super.onCreate(savedInstanceState);
        setContentView(R.layout.activity_main);
        phoneRecyclerView = (RecyclerView) findViewById(R.id.phone_recycler_view);
        phoneRecyclerView.setLayoutManager(new LinearLayoutManager(this, LinearLayoutManager.VERTICAL, false));
        phoneRecyclerView.setAdapter(new TypeARecyclerViewAdapter());
        tabletRightRecyclerView = (RecyclerView) findViewById(R.id.right_recycler_view);
        tabletRightRecyclerView.setLayoutManager(new LinearLayoutManager(this, LinearLayoutManager.VERTICAL, false));
        tabletRightRecyclerView.setAdapter(new TypeBRecyclerViewAdapter());
    }
}
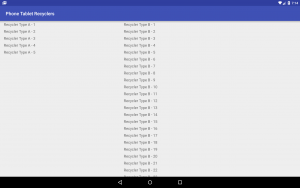
And when we run it on a tablet we get:
The Combined Application
Now we get to the final step of make our code run on both phone and tablet. Since the layout is handled automatically by the OS, all we need is a simple method to check if we are running on a phone or on a tablet:
public class MainActivity extends AppCompatActivity {

    RecyclerView phoneRecyclerView;
    RecyclerView tabletRightRecyclerView;

    @Override
    protected void onCreate(Bundle savedInstanceState) {
        super.onCreate(savedInstanceState);
        setContentView(R.layout.activity_main);
        phoneRecyclerView = (RecyclerView) findViewById(R.id.phone_recycler_view);
        phoneRecyclerView.setLayoutManager(new LinearLayoutManager(this, LinearLayoutManager.VERTICAL, false));
        if(!isTablet()) {
            phoneRecyclerView.setAdapter(new PhoneRecyclerViewAdapter());
        } else {
            phoneRecyclerView.setAdapter(new TypeARecyclerViewAdapter());
            tabletRightRecyclerView = (RecyclerView) findViewById(R.id.right_recycler_view);
            tabletRightRecyclerView.setLayoutManager(new LinearLayoutManager(this, LinearLayoutManager.VERTICAL, false));
            tabletRightRecyclerView.setAdapter(new TypeBRecyclerViewAdapter());
        }
    }

    private boolean isTablet() {
        return findViewById(R.id.right_recycler_view) != null;
    }
}
And this will run as expected on either phone or tablet.
You can get the entire tutorial project from GitHub here.


Great help…Have been through so many articles but glad found this one…best so far over this topic.
For the tablet, we’ll simply use the two TypeX… adapters in two different RecyclerViews. Let’s start with the activity layout. Remember to put it in the layout-sw720dp resources folder (or an equivalent resource folder qualifier that suits you):